실제로 프로덕션에서 작동하는 CI/CD 파이프라인 설정
실제 프로젝트를 위한 검증된 CI/CD 패턴 — GitHub Actions 워크플로우부터 금요일에 프로덕션을 망가뜨리지 않는 배포 전략까지.
제가 프로덕션 프로젝트를 위해 처음 설정했던 CI/CD 파이프라인은 npm test를 실행한 다음 SSH를 통해 VPS에 배포하는 단일 GitHub Actions 워크플로우였습니다. 작동하다가 어느 순간 작동하지 않게 되었는데, 배포 실패로 인해 금요일 저녁에 서버가 반쯤 업데이트된 상태로 남겨졌고, 저는 주말 내내 수동으로 파일을 되돌려야 했습니다. 그 경험을 통해 배포 파이프라인은 단순히 "테스트 실행 후 배포"가 아니라는 것을 배웠습니다. 그것은 git push와 사용자가 새 코드를 보는 것 사이에 존재하는 검사, 게이트, 롤백 메커니즘의 전체 시스템입니다.
이 게시물은 제가 여러 프로덕션 프로젝트를 통해 개선한 파이프라인 아키텍처와 여러분이 적용할 수 있는 구체적인 GitHub Actions 예시를 다룹니다.
파이프라인 아키텍처
프로덕션 파이프라인은 명확한 단계를 가지며, 각 단계는 특정 목적을 가집니다. 단계를 건너뛰면 지금은 몇 분을 절약할 수 있지만 나중에는 몇 시간을 잃게 됩니다.
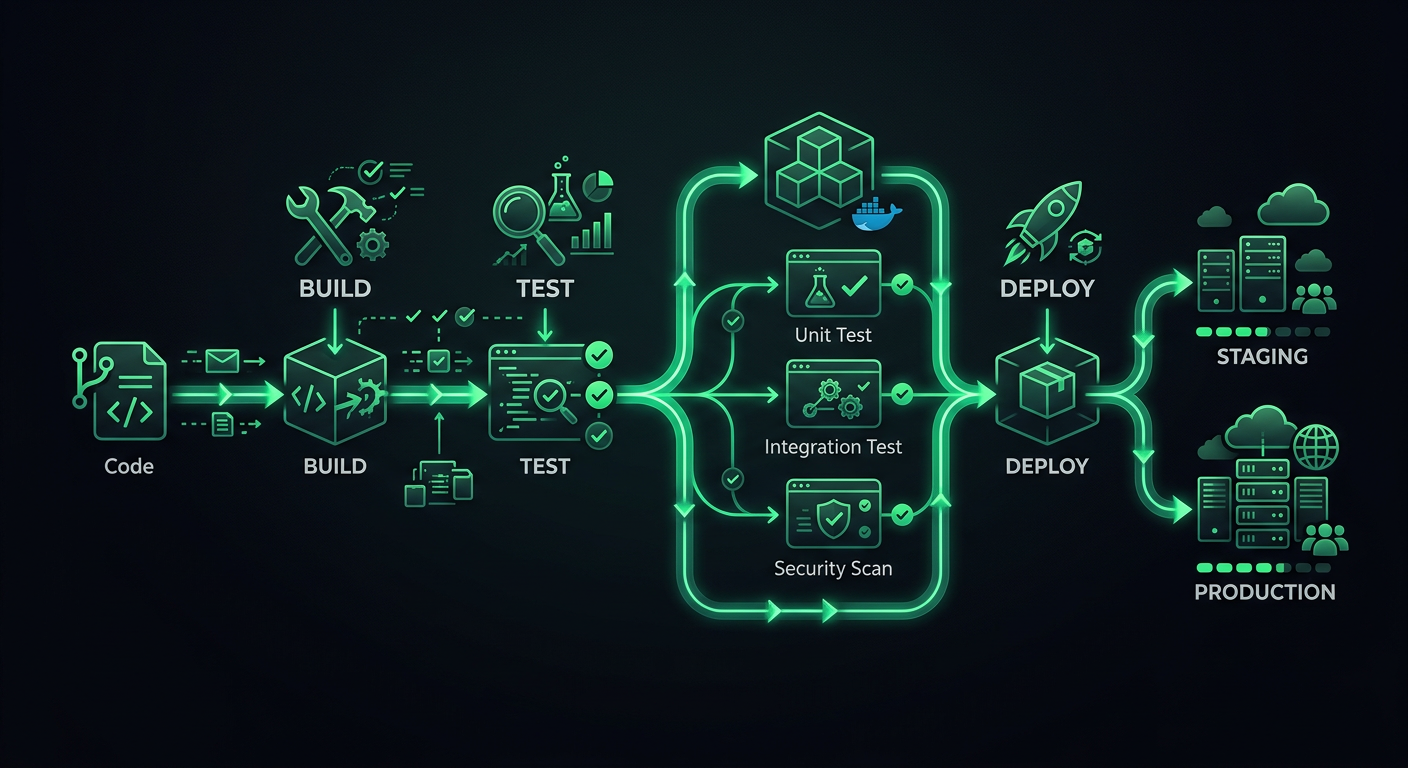
단계
Code Push
  │
  ├─→ Stage 1: Validation (lint, format, type-check)
  │
  ├─→ Stage 2: Testing (unit, integration)
  │
  ├─→ Stage 3: Build (compile, bundle, containerize)
  │
  ├─→ Stage 4: Deploy to Staging
  │
  ├─→ Stage 5: Smoke Tests / E2E on Staging
  │
  └─→ Stage 6: Deploy to Production
각 단계는 게이트 역할을 합니다. 유효성 검사가 실패하면 테스트는 실행되지 않습니다. 테스트가 실패하면 빌드는 시작되지 않습니다. 이는 컴퓨팅 시간을 절약하고 빠른 피드백을 제공합니다. 개발자는 린터를 실행하는 것을 잊었는지 8분 동안 테스트 스위트가 실패하기를 기다리는 대신 30초 이내에 알 수 있습니다.
트리거 전략
모든 푸시가 전체 파이프라인을 필요로 하는 것은 아닙니다. 제가 사용하는 트리거 구성은 다음과 같습니다.
# .github/workflows/ci.yml
name: CI
on:
  push:
    branches: [main, develop]
  pull_request:
    branches: [main, develop]
    types: [opened, synchronize, reopened]
풀 리퀘스트는 1-3단계(유효성 검사, 테스트, 빌드)를 실행합니다. develop 브랜치로의 병합은 스테이징에 배포합니다. main 브랜치로의 병합은 프로덕션에 배포합니다. 이는 PR 피드백을 빠르게 유지하면서 보호된 브랜치에서만 배포가 이루어지도록 보장합니다.
1단계: 유효성 검사
유효성 검사는 테스트가 실행되기 전에 서식 불일치 및 타입 오류를 잡아냅니다. 이러한 검사는 빠르며(30초 미만) 가장 일반적인 문제를 포착합니다.
jobs:
  validate:
    name: Validate
    runs-on: ubuntu-latest
    steps:
      - uses: actions/checkout@v4

      - name: Setup Node.js
        uses: actions/setup-node@v4
        with:
          node-version: 20
          cache: 'npm'

      - name: Install dependencies
        run: npm ci

      - name: Check formatting
        run: npx prettier --check "src/**/*.{ts,tsx,js,jsx,json,css}"

      - name: Lint
        run: npx eslint src/ --max-warnings 0

      - name: Type check
        run: npx tsc --noEmit
--max-warnings 0 규칙
ESLint는 오류(프로세스를 실패시킴)와 경고(실패시키지 않음)를 구분합니다. --max-warnings 0이 없으면 팀은 모두가 무시하는 수백 개의 경고를 축적하게 됩니다. CI에서 경고를 오류로 처리하면 팀은 경고를 수정하거나 규칙을 명시적으로 비활성화하도록 강제됩니다. 중간은 없습니다.
CI 검사로서의 서식 지정, 단순한 제안이 아님
CI에서 Prettier를 실행하는 것(--check 사용, --write 아님)은 모든 개발자가 올바른 편집기 확장을 가지고 있는지에 의존하지 않고 일관된 서식 지정을 보장합니다. CI에서 서식 지정이 실패하면 개발자는 로컬에서 npx prettier --write .를 실행하고 수정을 커밋합니다. 이것은 협상 불가능합니다. 도구가 결정을 내리면 서식 지정 논쟁은 끝납니다.
2단계: 테스트
테스트는 파이프라인의 중추입니다. 저는 더 빠른 피드백을 위해 테스트를 유형별로 병렬 작업으로 분할합니다.
  unit-tests:
    name: Unit Tests
    runs-on: ubuntu-latest
    needs: validate
    steps:
      - uses: actions/checkout@v4

      - name: Setup Node.js
        uses: actions/setup-node@v4
        with:
          node-version: 20
          cache: 'npm'

      - name: Install dependencies
        run: npm ci

      - name: Run unit tests
        run: npx vitest run --coverage --reporter=verbose

      - name: Upload coverage report
        if: always()
        uses: actions/upload-artifact@v4
        with:
          name: coverage-report
          path: coverage/

  integration-tests:
    name: Integration Tests
    runs-on: ubuntu-latest
    needs: validate
    services:
      postgres:
        image: postgres:16
        env:
          POSTGRES_USER: test
          POSTGRES_PASSWORD: test
          POSTGRES_DB: testdb
        ports:
          - 5432:5432
        options: >-
          --health-cmd pg_isready
          --health-interval 10s
          --health-timeout 5s
          --health-retries 5
      redis:
        image: redis:7
        ports:
          - 6379:6379
    steps:
      - uses: actions/checkout@v4

      - name: Setup Node.js
        uses: actions/setup-node@v4
        with:
          node-version: 20
          cache: 'npm'

      - name: Install dependencies
        run: npm ci

      - name: Run database migrations
        run: npx prisma migrate deploy
        env:
          DATABASE_URL: postgresql://test:test@localhost:5432/testdb

      - name: Run integration tests
        run: npx vitest run --config vitest.integration.config.ts
        env:
          DATABASE_URL: postgresql://test:test@localhost:5432/testdb
          REDIS_URL: redis://localhost:6379
통합 테스트를 위한 서비스 컨테이너
GitHub Actions 서비스 컨테이너는 잘 활용되지 않습니다. 통합 테스트에서 데이터베이스를 모킹하는 대신(이는 코드가 아닌 모의를 테스트함) 실제 PostgreSQL 인스턴스를 실행하세요. services 블록은 수명 주기 관리를 처리합니다. 컨테이너는 테스트 전에 시작되고 테스트 후에 중지됩니다.
이는 컨테이너 시작에 약 15-20초를 추가하지만, 실제 데이터베이스를 대상으로 테스트하여 얻는 신뢰는 그만한 가치가 있습니다.
병렬 테스트 실행
단위 테스트와 통합 테스트는 병렬로 실행됩니다(둘 다 needs: validate이며, needs: unit-tests가 아님). 이는 총 파이프라인 시간을 줄입니다. 단위 테스트가 2분, 통합 테스트가 4분 걸린다면, 병렬 실행은 6분 대신 4분을 기다린다는 의미입니다.
3단계: 빌드
빌드 단계는 프로젝트가 컴파일되고 배포 가능한 아티팩트를 생성하는지 확인합니다.
  build:
    name: Build
    runs-on: ubuntu-latest
    needs: [unit-tests, integration-tests]
    steps:
      - uses: actions/checkout@v4

      - name: Setup Node.js
        uses: actions/setup-node@v4
        with:
          node-version: 20
          cache: 'npm'

      - name: Install dependencies
        run: npm ci

      - name: Build application
        run: npm run build
        env:
          NODE_ENV: production

      - name: Upload build artifacts
        uses: actions/upload-artifact@v4
        with:
          name: build-output
          path: dist/
          retention-days: 7
빌드 캐싱
Docker 기반 배포의 경우, 레이어 캐싱은 빌드 속도를 획기적으로 향상시킵니다.
  build-docker:
    name: Build Docker Image
    runs-on: ubuntu-latest
    needs: [unit-tests, integration-tests]
    steps:
      - uses: actions/checkout@v4

      - name: Set up Docker Buildx
        uses: docker/setup-buildx-action@v3

      - name: Login to Container Registry
        uses: docker/login-action@v3
        with:
          registry: ghcr.io
          username: ${{ github.actor }}
          password: ${{ secrets.GITHUB_TOKEN }}

      - name: Build and push
        uses: docker/build-push-action@v6
        with:
          context: .
          push: ${{ github.event_name != 'pull_request' }}
          tags: |
            ghcr.io/${{ github.repository }}:${{ github.sha }}
            ghcr.io/${{ github.repository }}:latest
          cache-from: type=gha
          cache-to: type=gha,mode=max
cache-from: type=gha는 GitHub Actions 캐시를 사용하여 실행 간에 Docker 레이어를 저장합니다. 일반적인 Node.js 애플리케이션의 경우, 종속성만 변경될 때 빌드 시간을 3-4분에서 30-60초로 단축합니다.
CI를 위한 Dockerfile 모범 사례
Dockerfile 구조는 빌드 캐시 효율성에 직접적인 영향을 미칩니다. 레이어를 가장 적게 변경되는 것부터 가장 자주 변경되는 순서로 정렬하세요.
FROM node:20-alpine AS base

# System dependencies (rarely changes)
RUN apk add --no-cache libc6-compat

# Package manifests (changes when dependencies change)
WORKDIR /app
COPY package.json package-lock.json ./

# Install dependencies (cached unless manifests change)
FROM base AS deps
RUN npm ci --production

FROM base AS build
RUN npm ci
COPY . .
RUN npm run build

# Production image
FROM node:20-alpine AS runner
WORKDIR /app
ENV NODE_ENV=production

COPY --from=deps /app/node_modules ./node_modules
COPY --from=build /app/dist ./dist
COPY --from=build /app/package.json ./

EXPOSE 3000
CMD ["node", "dist/server.js"]
멀티스테이지 빌드는 최종 이미지 크기를 작게 유지하고(개발 종속성, 소스 코드 없음), 레이어 순서는 package.json 또는 package-lock.json이 변경될 때만 npm ci가 실행되도록 보장합니다.
4단계: 스테이징 배포
스테이징 배포는 develop 브랜치로 병합될 때 자동으로 이루어집니다. 스테이징 환경은 가능한 한 프로덕션과 유사해야 합니다. 동일한 인프라, 동일한 환경 변수(다른 값), 동일한 스케일링 구성이어야 합니다.
  deploy-staging:
    name: Deploy to Staging
    runs-on: ubuntu-latest
    needs: build
    if: github.ref == 'refs/heads/develop' && github.event_name == 'push'
    environment:
      name: staging
      url: https://staging.example.com
    steps:
      - uses: actions/checkout@v4

      - name: Download build artifacts
        uses: actions/download-artifact@v4
        with:
          name: build-output
          path: dist/

      - name: Deploy to Cloud Run (Staging)
        uses: google-github-actions/deploy-cloudrun@v2
        with:
          service: my-api-staging
          region: us-central1
          image: ghcr.io/${{ github.repository }}:${{ github.sha }}
          env_vars: |
            NODE_ENV=staging
            DATABASE_URL=${{ secrets.STAGING_DATABASE_URL }}
GitHub 환경
워크플로우의 environment 키는 GitHub의 환경 보호 규칙을 활성화합니다. 수동 승인을 요구하거나, 배포할 수 있는 브랜치를 제한하거나, 환경별 비밀을 설정할 수 있습니다. 스테이징의 경우, 일반적으로 승인 없이 자동 배포를 요구합니다. 프로덕션의 경우, 최소 한 명의 검토자를 요구합니다.
5단계: 스모크 테스트
스테이징에 배포한 후, 배포된 애플리케이션이 실제 환경에서 제대로 작동하는지 확인하기 위해 기본적인 테스트 세트를 실행합니다.
  smoke-tests:
    name: Smoke Tests
    runs-on: ubuntu-latest
    needs: deploy-staging
    steps:
      - uses: actions/checkout@v4

      - name: Setup Node.js
        uses: actions/setup-node@v4
        with:
          node-version: 20
          cache: 'npm'

      - name: Install dependencies
        run: npm ci

      - name: Wait for deployment
        run: |
          for i in {1..30}; do
            status=$(curl -s -o /dev/null -w "%{http_code}" https://staging.example.com/health)
            if [ "$status" = "200" ]; then
              echo "Service is healthy"
              exit 0
            fi
            echo "Waiting for service... (attempt $i)"
            sleep 10
          done
          echo "Service did not become healthy"
          exit 1

      - name: Run smoke tests
        run: npx playwright test --config=playwright.smoke.config.ts
        env:
          BASE_URL: https://staging.example.com
스모크 테스트는 전체 E2E 테스트가 아닙니다. 홈페이지가 로드되는지, 사용자가 로그인할 수 있는지, 주요 API 엔드포인트가 데이터를 반환하는지 등 중요한 경로를 확인합니다. 2분 이내에 완료되는 5~10가지 시나리오입니다. 스모크 테스트가 실패하면 스테이징 배포는 롤백되고 프로덕션 배포는 진행되지 않습니다.
6단계: 프로덕션 배포
프로덕션 배포는 배포 전략이 가장 중요한 부분입니다. 여러 접근 방식이 있으며, 각각 다른 장단점을 가집니다.
롤링 배포 (Rolling Deployment)
가장 간단한 전략입니다. 새 인스턴스가 시작되는 동안 이전 인스턴스는 트래픽이 점진적으로 줄어듭니다. 배포 중 어느 시점에서든 일부 요청은 이전 버전으로, 일부는 새 버전으로 전달됩니다. 이는 대부분의 컨테이너 플랫폼의 기본값입니다.
장점: 간단하고 추가 인프라 비용이 없습니다. 단점: 두 버전이 동시에 트래픽을 처리하므로 데이터베이스 스키마 변경 또는 API 계약 변경과 관련된 문제가 발생할 수 있습니다.
블루-그린 배포 (Blue-Green Deployment)
두 개의 동일한 환경(블루 및 그린)이 존재합니다. 하나는 트래픽을 처리하고 다른 하나는 유휴 상태입니다. 유휴 환경에 배포하고 작동하는지 확인한 다음 라우터를 전환합니다. 문제가 발생하면 다시 전환합니다.
  deploy-production:
    name: Deploy to Production
    runs-on: ubuntu-latest
    needs: smoke-tests
    if: github.ref == 'refs/heads/main' && github.event_name == 'push'
    environment:
      name: production
      url: https://api.example.com
    steps:
      - name: Deploy new revision
        uses: google-github-actions/deploy-cloudrun@v2
        with:
          service: my-api-production
          region: us-central1
          image: ghcr.io/${{ github.repository }}:${{ github.sha }}
          flags: '--no-traffic'

      - name: Run production health check
        run: |
          REVISION_URL=$(gcloud run revisions describe my-api-production-${{ github.sha }} \
            --region us-central1 --format='value(status.url)')
          status=$(curl -s -o /dev/null -w "%{http_code}" "$REVISION_URL/health")
          if [ "$status" != "200" ]; then
            echo "Health check failed"
            exit 1
          fi

      - name: Migrate traffic
        run: |
          gcloud run services update-traffic my-api-production \
            --region us-central1 \
            --to-latest
--no-traffic 플래그는 새 리비전을 배포하지만 트래픽을 보내지 않습니다. 상태 확인이 통과되면 트래픽이 새 리비전으로 전환됩니다. 상태 확인이 실패하면 워크플로우가 중지되고 이전 리비전이 계속 서비스를 제공합니다.
카나리 배포 (Canary Deployment)
새 버전으로 트래픽의 작은 비율(5-10%)을 라우팅하고 오류율, 지연 시간 및 주요 비즈니스 지표를 모니터링합니다. 정의된 기간 후에 지표가 양호하면 점진적으로 트래픽을 늘립니다. 지표가 저하되면 롤백합니다.
      - name: Canary - route 10% of traffic
        run: |
          gcloud run services update-traffic my-api-production \
            --region us-central1 \
            --to-revisions=my-api-production-${{ github.sha }}=10

      - name: Monitor canary (5 minutes)
        run: |
          sleep 300
          # Check error rate for the canary revision
          ERROR_RATE=$(curl -s "$MONITORING_API/error-rate?revision=${{ github.sha }}")
          if (( $(echo "$ERROR_RATE > 1.0" | bc -l) )); then
            echo "Error rate too high: $ERROR_RATE%. Rolling back."
            gcloud run services update-traffic my-api-production \
              --region us-central1 \
              --to-latest
            exit 1
          fi

      - name: Promote canary to 100%
        run: |
          gcloud run services update-traffic my-api-production \
            --region us-central1 \
            --to-latest
카나리 배포를 사용해야 할 때: 10%의 트래픽으로도 통계적으로 의미 있는 오류율을 생성할 수 있을 만큼 충분한 트래픽이 있을 때. 분당 100개의 요청을 처리하는 서비스의 경우, 10%는 분당 10개의 요청을 제공하며, 이는 몇 분 이내에 상승된 오류율을 감지하기에 충분합니다. 분당 10개의 요청을 처리하는 서비스의 경우 카나리 배포는 의미가 없습니다.
롤백 메커니즘
모든 배포에는 문서화된 롤백 경로가 있어야 합니다. "이전 버전 재배포"는 롤백 전략이지만 느립니다. 더 나은 옵션은 다음과 같습니다.
트래픽 전환을 통한 즉각적인 롤백
--no-traffic으로 배포하고 트래픽을 전환하는 경우, 롤백은 단일 명령으로 이루어집니다.
# Roll back to the previous revision
gcloud run services update-traffic my-api-production \
  --region us-central1 \
  --to-revisions=PREVIOUS_REVISION=100
이전 리비전이 여전히 실행 중이므로 몇 초 만에 적용됩니다.
자동 롤백
오류율이 급증할 경우 자동으로 롤백하는 배포 후 모니터링 단계를 추가합니다.
      - name: Post-deploy monitor
        run: |
          for i in {1..10}; do
            sleep 60
            ERROR_RATE=$(curl -s "$MONITORING_API/error-rate?window=5m")
            if (( $(echo "$ERROR_RATE > 2.0" | bc -l) )); then
              echo "Error rate $ERROR_RATE% exceeds threshold. Rolling back."
              gcloud run services update-traffic my-api-production \
                --region us-central1 \
                --to-revisions=$PREVIOUS_REVISION=100
              exit 1
            fi
            echo "Minute $i: Error rate $ERROR_RATE% — OK"
          done
데이터베이스 마이그레이션 롤백
이것이 가장 어려운 부분입니다. 배포에 데이터베이스 스키마 변경이 포함된 경우, 데이터베이스를 롤백하지 않고 애플리케이션을 롤백하면 불일치가 발생합니다. 해결책은 **확장-축소 마이그레이션(expand-and-contract migrations)**입니다.
- 확장(Expand): 이전 열을 제거하지 않고 새 열/테이블을 추가합니다. 새 열을 nullable로 만들거나 기본값을 지정합니다.
- 배포(Deploy): 새 코드는 이전 열과 새 열 모두에 씁니다. 새 열에서 읽고 이전 열로 폴백합니다.
- 데이터 마이그레이션(Migrate data): 이전 데이터에서 새 열을 백필합니다.
- 축소(Contract): 확인되면 새 열만 사용하는 코드를 배포합니다. 그런 다음 이전 열을 삭제합니다.
이렇게 하면 모든 단계를 독립적으로 되돌릴 수 있습니다.
비밀 관리
절대 비밀을 하드코딩하지 마세요. .env 파일을 절대 커밋하지 마세요. GitHub Actions에서 비밀을 처리하는 방법은 다음과 같습니다.
GitHub 비밀
대부분의 경우 GitHub의 내장 비밀로 충분합니다. 암호화되어 있으며, 로그에 노출되지 않고, 리포지토리 또는 조직에 범위가 지정됩니다.
env:
  DATABASE_URL: ${{ secrets.DATABASE_URL }}
  API_KEY: ${{ secrets.API_KEY }}
환경 범위 비밀
스테이징 및 프로덕션에 대한 다른 비밀:
deploy-staging:
  environment: staging
  # ${{ secrets.DATABASE_URL }} resolves to the staging value

deploy-production:
  environment: production
  # ${{ secrets.DATABASE_URL }} resolves to the production value
외부 비밀 관리자
더 큰 팀이나 더 엄격한 규정 준수 요구 사항의 경우 AWS Secrets Manager, Google Secret Manager 또는 HashiCorp Vault를 사용하세요. 애플리케이션은 환경 변수로 받는 대신 런타임에 비밀을 가져옵니다.
import { SecretManagerServiceClient } from '@google-cloud/secret-manager';

const client = new SecretManagerServiceClient();

async function getSecret(name: string): Promise<string> {
  const [version] = await client.accessSecretVersion({
    name: `projects/my-project/secrets/${name}/versions/latest`,
  });
  return version.payload?.data?.toString() || '';
}
배포 모니터링
코드가 라이브 상태가 되었다고 해서 배포가 완료된 것은 아닙니다. 코드가 작동하는 것을 확인했을 때 완료된 것입니다.
배포 알림
관련 컨텍스트와 함께 배포 이벤트를 Slack으로 보냅니다.
      - name: Notify Slack
        if: always()
        uses: slackapi/slack-github-action@v2
        with:
          webhook: ${{ secrets.SLACK_WEBHOOK }}
          webhook-type: incoming-webhook
          payload: |
            {
              "text": "${{ job.status == 'success' && 'Deployed' || 'Failed to deploy' }} `${{ github.sha }}` to production",
              "blocks": [
                {
                  "type": "section",
                  "text": {
                    "type": "mrkdwn",
                    "text": "*${{ job.status == 'success' && ':white_check_mark: Deployment Successful' || ':x: Deployment Failed' }}*\nCommit: `${{ github.sha }}`\nAuthor: ${{ github.actor }}\nMessage: ${{ github.event.head_commit.message }}"
                  }
                }
              ]
            }
배포 후 상태 확인
모든 프로덕션 배포 후, 중요한 엔드포인트가 올바르게 응답하는지 확인합니다.
      - name: Verify production health
        run: |
          endpoints=("/" "/api/health" "/api/v1/status")
          for endpoint in "${endpoints[@]}"; do
            status=$(curl -s -o /dev/null -w "%{http_code}" "https://api.example.com$endpoint")
            if [ "$status" != "200" ]; then
              echo "FAILED: $endpoint returned $status"
              exit 1
            fi
            echo "OK: $endpoint returned $status"
          done
완전한 파이프라인 예시
이 모든 것을 종합하여, Cloud Run에 배포된 Node.js 애플리케이션을 위한 간결하지만 완전한 파이프라인은 다음과 같습니다.
name: CI/CD Pipeline
on:
  push:
    branches: [main, develop]
  pull_request:
    branches: [main, develop]

concurrency:
  group: ${{ github.workflow }}-${{ github.ref }}
  cancel-in-progress: ${{ github.event_name == 'pull_request' }}

jobs:
  validate:
    runs-on: ubuntu-latest
    steps:
      - uses: actions/checkout@v4
      - uses: actions/setup-node@v4
        with: { node-version: 20, cache: 'npm' }
      - run: npm ci
      - run: npx prettier --check "src/**/*.{ts,tsx}"
      - run: npx eslint src/ --max-warnings 0
      - run: npx tsc --noEmit

  test:
    needs: validate
    runs-on: ubuntu-latest
    services:
      postgres:
        image: postgres:16
        env: { POSTGRES_USER: test, POSTGRES_PASSWORD: test, POSTGRES_DB: testdb }
        ports: ['5432:5432']
        options: --health-cmd pg_isready --health-interval 10s --health-timeout 5s --health-retries 5
    steps:
      - uses: actions/checkout@v4
      - uses: actions/setup-node@v4
        with: { node-version: 20, cache: 'npm' }
      - run: npm ci
      - run: npx vitest run --coverage
        env:
          DATABASE_URL: postgresql://test:test@localhost:5432/testdb

  build-and-push:
    needs: test
    if: github.event_name == 'push'
    runs-on: ubuntu-latest
    steps:
      - uses: actions/checkout@v4
      - uses: docker/setup-buildx-action@v3
      - uses: docker/login-action@v3
        with:
          registry: ghcr.io
          username: ${{ github.actor }}
          password: ${{ secrets.GITHUB_TOKEN }}
      - uses: docker/build-push-action@v6
        with:
          context: .
          push: true
          tags: ghcr.io/${{ github.repository }}:${{ github.sha }}
          cache-from: type=gha
          cache-to: type=gha,mode=max

  deploy:
    needs: build-and-